For some strange reason, I have recently been obsessed with creating the perfect recipe for a red velvet cheesecake. This was possibly inspired by The Cheesecake Factory's Red Velvet Cheesecake. Just so you know, I did a lot of research and tried a lot of different ingredients and techniques and this is what I came up with. I hope you enjoy.
The Cheesecake: I wanted to come up with a yummy cheesecake that was not too dense, sweet but not too sweet, and would complement the red velvet cake. I read and tried many different recipes and what I noticed was a difference in ingredients and cooking techniques. Some of the different ingredients I played around with in coming up with this recipe were: flour, lemon peel, sour cream, heavy whipping cream, the number of eggs to use as well as and others. I will share with you my journey through different cooking techniques when we get to that.
This is what I came up with...
4 pkgs. cream cheese (2lbs)
1 1/3 cup granulated sugar
pinch of salt
2 tsp. pure vanilla
4 large eggs
2/3 cup sour cream
2/3 cup heavy whipping cream
One important thing I learned in my research is that when making your cheesecake, it is very important that all of your ingredients are at room temperature (not straight out of the fridge).
Ready? Ok, let's do this... Preheat your oven to 325 degrees.
Start by cutting your 4 packs of cream cheese into cubes and place in your mixing bowl. Mix on medium speed for about 4 minutes until smooth and creamy.
Next we will add 1 1/3 cup of sugar. Then on medium speed mix for another 4 minutes. Add a pinch of salt and mix for 1 minute.
*Note: As you add each ingredient you want to use a baking spatula/scraper to scape the sides of the bowl in order to make sure all of the stuff is getting mixed in.
Add 2 tsp. of vanilla and mix for another minute.
Another important technique (if you will...haha) is that you add 1 egg at a time, mixing 1 minute with each egg. In other words, add 1 egg, mix on medium speed for 1 minute. Add 2nd egg, mix for 1 minute. Add 3rd egg, mix for 1 minute. Then, add 4th egg and mix for 1 minute. Are you scraping down the sides of your bowl?
Now we will add 2/3 cup of sour cream and mix for 1 minute or until well incorporated. Scrape the sides of the bowl.
Add 2/3 cup of heavy whipping cream and mix for about 1 minute.
How does yours look? This is what mine looks like...isn't it fun to bake together? :) I know, I'm a dork. Please don't make fun. Or at least, don't let me know that you are (haha).
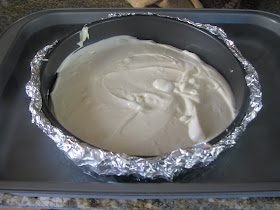
Ok, here is where cooking technique comes in. I read a lot about how to make sure your cheese cake doesn't crack and the advise out there is to use foil on your springform pan and place it in another pan with water to regulate the cooking temperature as it cooks. Well, I tried this technique and it didn't work well for me. The water leaked into my cheesecake. urgh, not good! I had good success however with no cracks in my cheesecake by simply using a springform pan and cooking without the water bath. So ignore the foil on the pans I used because I forgot to take a picture of the pans I used without the foil.
This is a picture of the batch I did with the extra foil, cooking it in a pan with water. Again, I repeat, I didn't end up liking this technique because water got into my cheesecake. Part of my learning curve. I had to remake the whole cake. I was tempted not to even mention this part but I figure if you can learn from my mistakes, that is what this whole endeavor was about. Lucky for you, I did the research (haha) and recommend this...
Pour your cheesecake batter into 2 springform pans. Place in the oven at 325 degrees and cook for about 45 minutes to 1 hour. Do not open your oven while it is cooking. Hopefully you have a light and can watch it cook without opening the door. You will know it is done when the sides are set and a little puffy and the center is slightly jiggly.
At this point I suggest letting is cool by (of course turning the oven off) cracking the oven door about and inch or two and let cool for about 1 hour. Then remove it from the oven and let it cool for another hour. Then, cover the top with foil and place in the fridge for at least 4 hours. I left mine over night and assembled the cake the next day.
This is what my cooled cheesecake looks like (the one without the foil and without the soggy cheesecake). Ok, I'm going to cover both of them with foil and stick them in the fridge.
Now for the red velvet cake.
First of all I will share with you some of what I learned in my research. I read many different recipes and tried a few and here is what I learned/noticed. Some either used shortening or cooking oil. I tried both. The one with the shortening was dense and I didn't care for it. I preferred the one using cooking oil. Also when reading different recipes I noticed a difference in how they added the baking soda and the vinegar. I won't go into all the details, I will just show you what I found worked the best :).
Here is what we will need...
2 1/2 cups of cake flour
2 tbs. unsweetened cocoa powder
1tsp. salt
1 1/2 cups sugar
1 1/2 cups canola oil
2 large eggs
2 tbs. red food coloring
1 tsp. pure vanilla
1 cup buttermilk
1 1/2 tsp. baking soda
2 tsp. vinegar
Preheat your oven to 350 degrees.
I should mention that you should have all of your ingredients out and ready. You will also need 1 bowl for mixing (I use the one that comes with my mixer) and two additional bowls (I used 1 glass bowl for the flour mixture and a large measuring cup for the buttermilk and food coloring mixture). Also, you will need 2 9inch diameter cooking pans.
In a large glass bowl (not the one with the mixer) sift in 2 1/2 cups of cake flour. If you don't have a sifter I recommend using a whisk.
Add 2 tbs. cocoa powder.
Add 1 tsp. salt.
Whisk it together and set aside.
In your mixing bowl, pour in 1 1/2 cups of sugar.
Pour in 1 1/2 cups of canola oil. Then mix at medium speed until well combined. I should mention that for this cake mix your should use the whisk beater as you will see in the picture.
Add 1 egg at a time, mixing well after each addition. Or, add 1 egg and mix for 1 minute. Add 2nd egg and mix for 1 minute.
Add 1 tsp. vanilla. As you can see it, I just eyeball it with the vanilla :) Mix for 1 minute.
*If you have a large measuring cup like mine you can do this step in it. If not, use a separate glass bowl.
Measure 1 cup of buttermilk.
Add 2 tbs. of red food coloring to the buttermilk and stir together with a spoon until well mixed and set aside.
This is what mine looks like.
Now we will come back to our mixer with the sugar mixture. Have your flour mixture and buttermilk at hand for the following steps...
Ready? Here we go...
Oh, wait! Let's get our pans ready.
You will need to generously spray 2 of your 9inch diameter round pans with cooking spray. If you want to be extra careful about you cake not sticking you can place a cut piece of wax paper to the bottom. In my different attempts at the cakes, the first time I didn't use wax paper and my cake almost stuck. Luckily I was able to get it out in one piece, Whew! The second attempt however I did use wax paper. My suggestion is that if you don't use wax paper you will be ok as long as you cool the cake for 10 to 15 minutes and then remove from the pan. My problem came when I let it cool for too long and it started to stick. The baking gods were on my side though as with a bit of work they came out beautifully. ;)
Ok, back to our cake
You are going to add the flour mixture in 3 batches, alternating with the buttermilk mixture. Keep reading before you continue.
In your mixing bowl add 1/3 of the flour mixture only. Mix on medium speed for a good minute or two or until well combined. Remember to scrape down the sides each time to get everything well combined.
This is what mine looks like.
Add only 1/2 of the buttermilk mixture and mix for a minute or two.
Now, add the 2nd 1/3 of the flour mixture (or 1/2 of what is left) and mix for 1-2 minutes.
Add the rest of the buttermilk mixture and blend for 1-2 minutes.
Add the last 1/3 of the flour mixture and blend for 1-2 minutes. Take the bowl out of the mixture and set aside for the next step.
This is the so called "critical technique" that I mentioned before. Get a very small bowl and have your baking soda and vinegar close at hand. In the small bowl measure and put in it 1 1/2 tsp. of baking soda.
To the baking soda we will add 2 tsp. of vinegar. You will notice it foaming up. Do this part fairly quickly. Stir it together with a spoon to combine it. It should only be a couple seconds. Then add it to the cake mixture and with your baking spatula/scraper, mix it into the batter. You want this mixture to be well combined with the cake mixture. Then quickly divide it evenly into the 2 round cake pans and place in the oven at 350 degrees. Here is what it looks like...
Bake at 350 degrees for 30-35 minutes or until you can stick a toothpick down the middle and it comes out clean.
Remove from oven. Let it cool 10-15 minutes and remove from the pan. Then let it cool completely while we finish waiting for our cheesecake to cool in the fridge for its 4 hour period.
At least 4 hour later (cheesecakes in the fridge for 4 hours or longer...
Now it's time to assemble the cake.
First, let's make the frosting. Here is what you will need:
1 package of cream cheese
1 cup powdered sugar
pinch of salt (or 1/8 tsp.)
1 tbs. pure vanilla
1 1/2 cups of heavy whipping cream
Before we get started, if possible, put your mixing bowl and whisk beater in the fridge for about 15 minutes. This will be helpful in getting the frosting to whip up nicely...
tick tock....
Ok, let's get going.
In our mixing bowl let's put 1 1/2 cups of heavy whipping cream. Beat at medium high speed until it is whipped well with peaks (looking like whip cream :) ).
This is what mine looks like.
Remove and put in another bowl and set aside.
Cut the cream cheese into cubes and put in the mixing bowl. Add 1 cup of powdered sugar
Add 1/8 tsp. salt to bowl.
Add about 1 tbs. vanilla.
Mix on medium high for 3-4 minutes until smooth and creamy.
Add back into the mixing bowl the whipped cream and beat on medium for 1 minute.
Here is mine. Now we are ready to put the pieces together...
Before we start you have a couple options I would like to mention at this point. If your red velvet cakes are quite thick you may choose to slice 1 horizontally to make the 2 layers of red velvet. If not, use both cakes. I tried both ways. Something to mention, if you do slice your red velvet cake, when you frost it, in order to keep the red crumbs out of your frosting you can do a couple of things. 1. use the spatula for placing the frosting on the cake and spreading knife for spreading the frosting. This way if your knife gets crumbs on it you can just wash it of and finish frosting. Using 2 utensils keeps any crumbs out of the bulk of the frosting. 2. If you do get red crumbs that show in the frosting on your cake, you can cover the cake with a thin layer of frosting, put it in the fridge to firm a little (15-20 minutes) and then frost again.
Place one of your red velvet cake layers on the plate you want to serve it on. Use your spatula to put a good amount of frosting on the first layer. Spread with a spreading knife.
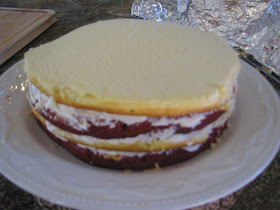
Place one of the cheesecakes on top. My cheesecake was wider around than the red velvet so I took and knife and trimmed it. Hopefully yours is the same size. Then place a large spoonful of frosting on top of the cheesecake.
Spread and even layer of frosting.
Place the 2nd layer of red velvet on top of the cheesecake.
Frost the top of the red velvet cake layer.
Place the last layer of cheese cake on top and cover in frosting.
Ummm, at this point I would like to state, for the record, I am not a professional cake decorator. So, don't laugh, or do I did. I'm just warning you....
Frost the best that you can. Not that I should be giving advise, so don't get me wrong, I'm not but here is what I did. I spread a smooth layer over the entire cake and then I used a pampered chef thing that I have (don't know what it is called but it is prob. for icing???) and squirted little rosette like things on the top and strips along the lower side.


No comments:
Post a Comment